Sunday, December 21, 2014

Easy Peppermint Christmas Coal Cookies

I should have been a housewife

This fun Christmas treat is perfect for anyone, regardless if they're on the naughty or nice list. I've seen the recipe floating around on Pinterest for years but thought I'd give it a try this Christmas.


Christmas Coal
1 16 oz package of chocolate sandwich cookies
5 cups mini marshmallows
4 tbsp butter
1/2 tsp vanilla or peppermint extract

  1. Pulse sandwich cookies in food processor until finely ground.
  2. In a medium bowl combine marshmallows, butter, extract, and ground cookies
  3. Heat in microwave for 1 minute then mix until well combined.
  4. Drop small clumps (careful, it may still be hot) onto parchment paper and allow to cool.

Enjoy!


Saturday, December 20, 2014

Mickey Gingerbread Cookies


I can't even remember the last time I made gingerbread cookies, it was easily over 10 years ago. For some reason this year I was craving them and when I saw this adorable Mickey Mouse cookie cutter  I knew I had to buy it and make some. I usually don't spend more than a couple bucks on cookie cutters, but for this one I made an exception.


This fun Christmas treat is perfect for anyone, regardless if they're on the naughty or nice list. I've seen the recipe floating around on Pinterest for years but thought I'd give it a try this Christmas.


Gingerbread Recipe
1 cup butter
1 cup granulated sugar
1 1/4 cup molasses
2 eggs
1 tsp vanilla extract
6 cups all-purpose flour, plus more for rolling
1 tsp baking soda
1 tsp salt
2 tsp ground ginger
3 tsp ground cinnamon
1 ½ tsp ground cloves
2 tsp ground nutmeg
  1. Cream butter and sugar in a medium bowl. Add molasses, eggs, and vanilla extract. 
  2. Mix together dry ingredients with a whisk in a medium bowl. Add one cup of mixed dry ingredients to the wet ingredients, incorporating each addition before adding the next.
  3. Divide dough into three portions and wrap in plastic wrap. Refrigerate for 1 hour. While dough is chilling preheat oven to 375 F.
  4. Spread flour onto your working surface and roll dough to approximately 1/4" (Rolling pin guides are AMAZING. They take all of the guesswork out of rolling out dough and come in a few different sizes. You can find them here).
  5. Cut out cookies and place on parchment lined baking sheets. Baking time is 10 minutes for a 4" cookie, 2 minutes less or more for a smaller or larger cookie respectively. Be careful not to burn the cookies since its hard to tell if they're browning or not. Start with 8 minutes for a medium 4" cookie then increase the baking time if needed.
  6. Let cool and then decorate! I decided to dip the ears in chocolate to make them look like they were wearing little mouse ear hats, plus it only took a couple of minutes extra.
Enjoy!

Monday, December 15, 2014

My Favorite Shrimp Ceviche

I should have been a housewife


I love going into specialty olive oil/vinegar stores and trying all the different styles and flavors they have. One of the first times I went I found coconut flavored white balsamic and was in heaven. I bought it and thought I'd use it on salads (which I still haven't done), but found a much better use for it; My favorite shrimp ceviche.

Ceviches are seafood dishes where acidic juices (such as lemon, lime, and orange) are used to "cook" the fish. Here's my go to recipe for shrimp ceviche.

Shrimp Ceviche

1 lb raw shrimp, peeled and deveined and cut into bit size pieces
6 limes, juiced (approx 2/3 cup)
2 lemons, juice (approx 1/3 cup)
2 tablespoons orange juice
1 cup cucumber, peeled and 1/4" cubed, seeds removed (approx. 1 medium)
1/2 cup finely chopped red onion (approx 1/2 medium)
1 jalapeno pepper, finely chopped1 avocado 1/2" cubed
1 tablespoon chopped cilantro, plus more for garnish
1/4 cup olive oil
1/4 teaspoon salt
2 tsp coconut balsamic vinegar
Tortilla chips


1. Cut raw shrimp into bite size pieces and place in non metallic bowl. Add lime, lemon, and orange juice to cover and refrigerate for 1/2 hour. Mix occasionally until shrimp are pink and look cooked through.

I should have been a housewife

Here the shrimp have turned pink and are no longer transparent

2. Add remaining ingredients and stir well. Can be kept in the refrigerator for 4 hours. Let sit at room temperature for a half hour before serving.

Enjoy!

Sunday, December 14, 2014

Sue's Mandelbread Cookies

I should have been a housewife

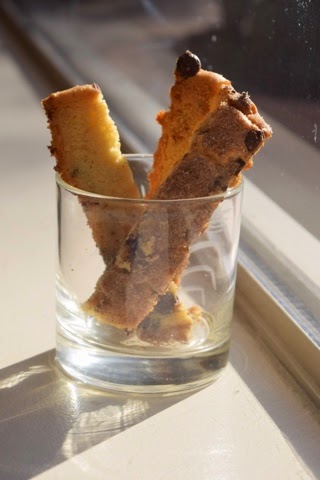
In preparation for the holidays, kitchen Kaplan was in full swing this Sunday morning. We made chocolate covered pretzels, gingerbread men, forgotten kisses, and my personal favorite, mandelbread cookies.

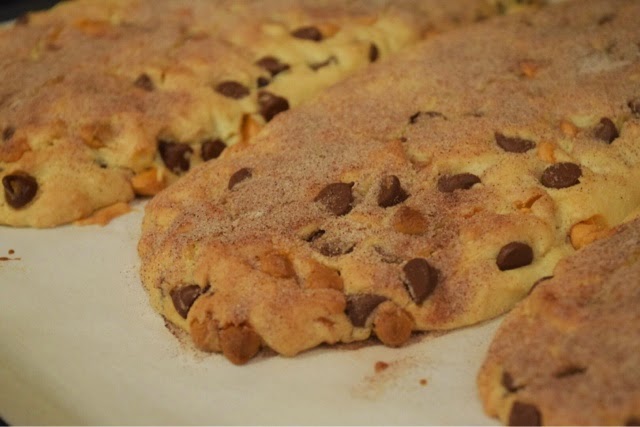
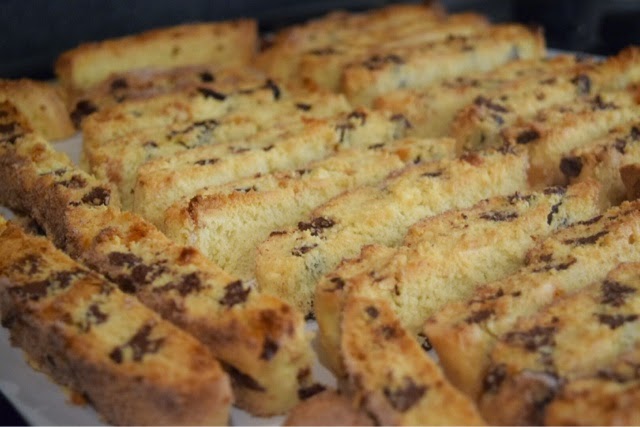
Mandelbread is a traditional Jewish cookie that is similar to a biscotti, but with this recipe they almost melt away in your mouth while maintaining a satisfying crunch. We used chocolate and butterscotch chips but I'm really excited to try the recipe with dried cranberries and pistachios as well. Here's the recipe we made this morning.

Sue's Mandelbread Cookies
3 cups flour
1 tsp salt
2 tsp baking powder
3 eggs
1 cup sugar
1 cup oil
7 oz chocolate chips
5 oz butterscotch chips
3 tbsp cinnamon and 3 tbsp sugar combined for dusting

1. Preheat oven to 375 F and line a large baking sheet with parchment paper. Mix together dry ingredients in a large bowl then add wet ingredients until well combined. Mix in chocolate and butterscotch chips.

2. Divide mixture into 3 loaves onto parchment lined baking sheet and sprinkle each with cinnamon sugar. Bake for 20 minutes until lightly golden brown.

I should have been a housewife

3. Cool for 15 minutes then slice into  3/4" pieces across the short side. Arrange cookies cut side up on the baking sheet and bake for an additional 15 minutes.

I should have been a housewife


Enjoy!

Be sure to follow me on instagram @rocky092 for more baking and cookie posts


Monday, December 8, 2014

Mom's Homemade Apple Strudel

I should have been a housewife

My dad loves apple strudel and lucky for him my mom makes one of the best ones out there. We make it every fall, usually with apples from my cousins tree. Here's the recipe we use:

Mom's Apple Strudel
3 apples, cut into 1/2 inch cubes (approximately)
1 teaspoon cinnamon
Juice from 1/2 a lemon
1/2 cup raisins
1/2 cup sugar 
5 sheet phyllo dough
1/2 stick butter, melted
1/3 cup sugar plus 1 tablespoon cinnamon for sprinkling
1/4 cup panko bread crumbs
1/4 cup chopped walnuts
Vanilla ice cream (optional)

1. Preheat oven to 350 F. Combine apples, cinnamon, lemon juice, raisins, and 1/2 cup sugar in a large bowl. Cover with a damp paper towel.

2. Prepare phyllo for use as per package instructions. Keep dough not being used moist by wrapping it in a damp kitchen cloth (we used the excess cloth from the work station to keep the dough moist). On parchment paper or a thin, damp towel, lay down the first sheet of phyllo dough. Brush butter across the entire top of the sheet and top with 1 tablespoon each of chopped walnuts, panko, and cinnamon sugar. Lay the next sheet of phyllo dough on top of it and repeat until all 5 sheets of phyllo have been used.


3. After all 5 sheets have been laid down and buttered, drain off any extra juices from the apple mixture. Pour the apple mixture into the center of the phyllo rectangle leaving two inches of free space on the shorter sides of the dough and about 3-4 inches of space on the long sides.


4. Fold up the 2 inch short sides of the phyllo dough to keep the mixture within the rectangle. Fold over the long sides of the rectangle next, making sure to overlap all edges of the dough.


5. Seal the edges and ends with the melted butter, and place, seam side down, onto a parchment lined baking sheet. Brush top of strudel with melted butter and sprinkle with remaining cinnamon sugar. Place onto a parchment lined baking sheet and bake for 30 minutes, or until top of strudel is flaky and slightly browned.


6. Allow strudel to cool slightly then slice and serve while still warm.


Enjoy!


Sunday, December 7, 2014

Hiking Pinnacle Peak


This weekend we decided to try a new hike called Pinnacle Peak. It's known as a pretty scenic hike and we were not disappointed. Here are some pictures from the days hike.


Saturday, December 6, 2014

Pizzookie- Chocolate Chip Cookie in a Pan

I should have been a housewife

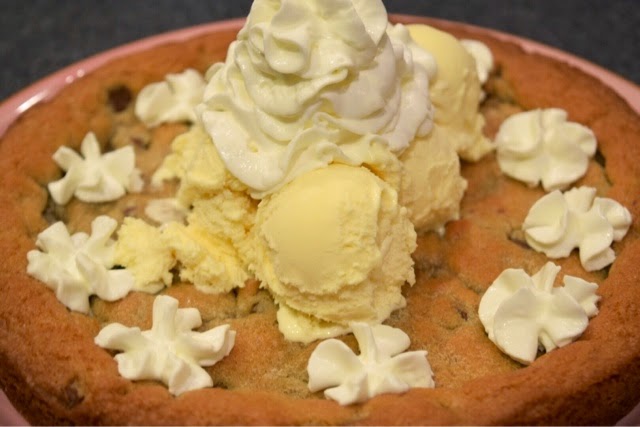
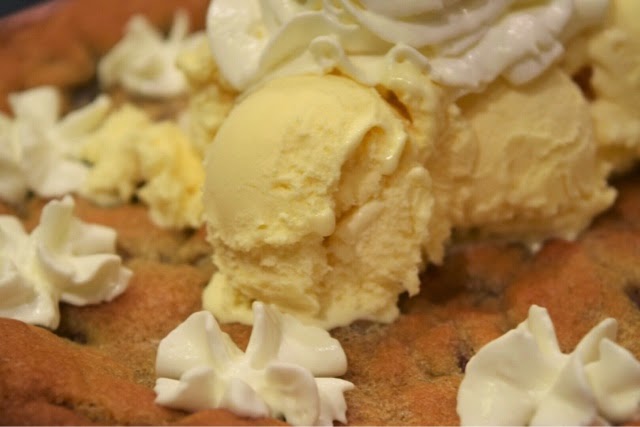
While in Arizona I was able to try one of the best desserts I'd had in a long time. A pizzookie. It's a half baked cookie thats made in a large pan and topped with ice cream. We had one while out to dinner last week and I loved it.

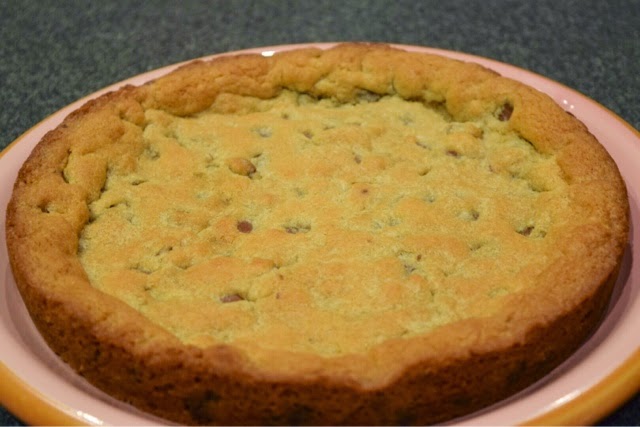
Last night I was half way through baking a batch of chocolate chip cookies when I was too lazy to dollop anymore onto the sheet pan. I decided to press the rest of the batter into a circular cake pan and try my hand at making a pizzookie.

I used the original Tollhouse chocolate chip cookie recipe minus the nuts and baked until the top of the cookie was just golden brown and still slightly mushy. I was half way through the batter when I decided to bake one large cookie so you cold half the recipe and have enough for the cake pan.

I had some Breyer's french vanilla ice cream in the freezer and that went perfect with the pizzookie.
I should have been a housewife
Cookie out of the oven


I should have been a housewife
Close up of the ice cream and pizzookie


Enjoy!

Be sure to follow me on instagram @rocky092 for more baking and cooking posts


Friday, December 5, 2014

New Camera and Some Cute Puppy Pictures


So I finally broke down and bought a DSLR. I found a great deal on the Nikon D3300 which came with a 18-55mm and a 55-200mm lens. I had to do so much research to actually find out what all the numbers and technical terms meant, and how to use them, but I couldn't be happier with the camera. 

I dove right in and started shooting in manual mode, adjusting the lighting, apertures, and shutter speed. It was pretty confusing at first, but I think I got the hang of it. I still have to get used to changing all the settings for different lighting situations and time of day, but I love the way the pictures of Smokey, Bella, and Zoe came out.

Enjoy!
Zoe napping on the couch


Zoe posing by the pool


Bella in one of her favorite perching spots


Smokey being his adorable self

Wednesday, November 5, 2014

Words to Live By

#truth


Monday, November 3, 2014

Skull and Crossbones Cookie Tutorial


Here's the tutorial for the skull and crossbone cookies as promised. I've been experimenting with a glaze (which has added corn syrup for more shine and a softer texture) instead of royal icing which can be a little dry and grainy for me. There are two icing consistencies that are used when decorating cookies, flood and piping. 

Flood icing aka 20 second icing is used to ice large areas of cookie and results in a smooth, even finish. Piping consistency is used for borders to keep flood icing in place and for details that need to keep their shape. 

When mixing colors I usually start with a medium consistency of icing, color it, then reserve a third of it to thicken for piping and thinning out the rest for flood. 

Piping icing should be the consistency of toothpaste and should be firm enough to hold it's shape, but not so firm that it breaks while piping. To get this consistency, I add powder sugar until the desired thickness is reached. 

Flood icing should have a honey-like consistency, thin enough so it easily smooths for an even finish but not so thin that it runs over. I add very small amounts of water (a few drops at a time) and mix until this consistency is reached. Another way to test for this is to draw a line in the icing with a spatula and count how many seconds it takes for it to smooth out again (as the names suggests, it should take about 20 seconds). 

Here are the step by step instructions for decorating the skull and crossbones sugar cookies as well as some other shots of the cookie decorating process. 


For the glaze icing 
2lbs powdered sugar 
1/4 c corn syrup 
1/4 c water 
1 teaspoon vanilla extract (clear if you need bright white icing) 
1/2 teaspoon butter extract 

The icing will need to be thickened for fine details and thinned slightly for flooding

For the skull and crossbone cookies you will need: 
White piping and flood icing 
Black piping icing 
Red flood icing (or any color of your choice for the bandana) 
4 disposable piping bags 
4 icing couplers 
Two #3 and two #12 piping tips 


P.S. Read my post from earlier this week on the best icing tip ever

Here is a royal icing recipe which I thought was a little easier to start out decorating with.


1. Trace out eyes, nose, and bandana on each skull cookie using food safe markers


2. With piping icing, outline the skull, eyes, and nose onto the cookies. If you don't want to fill in the eyes with black icing, make sure to pipe on the insides of the lines otherwise the marker will show (hindsight is 20/20).


3. With the flood icing, pipe along the edge of the piping icing so that the two consistencies overlap slightly. Keep to the inner edges so that the flood icing doesn't run over the sides the skull. Allow to dry for at least a half hour. 


4. After the first layer has dried to the touch, use piping icing to make teeth. Starting with the top row, alternate teeth and allow to dry for a half hour. Repeat with the lower row of teeth and allow to dry for another half hour. While the teeth are drying you can skip to steps 6-8 to save time in between the drying of the teeth. 


5. Fill in the missing teeth by piping more ovals between the teeth that have already dried. 


6. Pipe bandana ouline onto top of skull cookie with the piping icing. If any marker is showing you can also fill in the eyes and nostrils with the piping icing. 


7. Flood bandana with your color of choice flood icing. Pipe outlines on the cross bones and let dry for 15 minutes.


8. Flood crossbones using the same method in step 1. Add any additional details you like to the bandanna using piping icing. 


9. Allow cookies to dry overnight. I actually find glaze to be more prone to damage in transfer as compared to royal icing, so be careful when transporting them. 


Here are some more images from my cookie decorating night including the ghosts and spider web cookies

Piped ghost pumpkin spice sugar cookies 


Finished ghosts


The cookie station 


Piped outline on spider cookies


Finished web cookies


Finished spider and web cookie set


Midway through skulls and ghosts


Complete Halloween set

Be sure to follow me on instagram @rocky092 for more cookie and baking posts